Posts

Unit 7 Resubmission

Image
Decay  Here is my decay video. I chose to capture a series of images showing ice melting. I took a series of 90 images to capture from the start where there are ice cubes to the end where there's nothing left to see. My video lasts a couple of minutes, which shows me experimenting with decay. One thing I would improve on this video is the camea angles, I did'nt use a tri-pod, which meant some images were at different angles, this can effect my video becuase the constant camera movment doesnt give my GIF the professional look/effect to it. However for my first attempt at this I feel my GIF is successful becuase it clearly shows the idea I was creating of melting ice and clearly shows the stages of ice melting. The only thing I would change about my GIF is I would of used a tri-pod to keep little camera movements as possible meaning my GIF looking more effective. Narrative Sequence Above is my final Narrative Sequence. The story I am tryi

Unit 8 Website

Image

!Unit 6 3D Work

Image
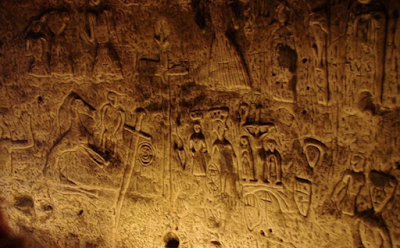
Context For Unit 6, as a class we have been asked to produce a 3D image. This could be anything from a 3D Dimension/model; to a 3D Image, something that comes off the page. For my idea I am going to create a 3D image and buy a pair of 3D glasses so my image will then come out the paper just like a 3D film, however in a still image. Using Photoshop I am going to edit my images of portraits, which I have taken in the set up studio at the back of my classroom. I took 3 images of Chloe and Jada. My images are full length body portraits because I feel they will be more effective when turing it into 3D.  The history of 3D art may have begun with the recognition of likenesses in natural objects for example trees, rocks and ivory, which were modified to enhance that likeness. This early interest in 3D can be seen even in the caves that were home to Upper Paleolithic Europeans. These hunter-gatherers painted stick figures and their abstract images of prey on cave walls, however fleshed

Pinhole Lumen Analysis

Image
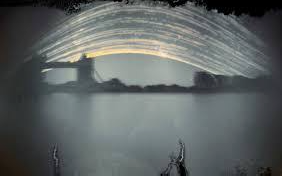
Pinhole Lumen Analysis Lumen Pinhole is a type of photography that is taking photographs without a camera, the word pinhole means capturing images without a digital camera its all about capturing the image through a small hole in either a box or a can and letting light for a certain amount of time through the pinhole will expose light to the photographic paper. Below are examples of what Lumen pinholes look like, these are examples from some photographers. For this project we were told to bring in an old can of drink for us to create our own pinhole lumen photography. The next step was to open the top of our can and pierce a needle size hold in the side of the can, we pierced the hole so light can be exposed to the paper I placed inside the can. I duck taped the top of the can so no light could enter and placed tape over the hole, which I didn't take off until I placed my can outside where it could capture the sunset and sunrise for three months. I placed my can outsid

After Effects

After Effects  Above is my attempt of creating an after effect. I feel my attempt is successful, if I was to improve my work i would repeat the process a few more times. The first step we were given a photo that we imported into After Effects. The next step was then separating layers and made layers for each part of the photo. The plane, The shard and The sky. We then moved it the sky layer slightly to make it seem as if the sky was moving along with the plane, which I loved diagonally across the page. I had to make sure I had traced around the plane correctly otherwise you would see parts of the background around the plane meaning my after effect wouldn't look realistic as it passes past the shard. The final edits I made was creating the sky looking warmer creating it to have more vivid colours. One thing I found hard when creating my after effects was judging how fast and far everything should move so it didn't look unrealistic. Overall other than that I found creating

Narrative Sequence

Image
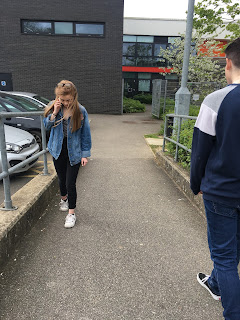
Narrative Sequence Narrative photography is the idea that photographs can be used to create a story. Narrative sequence is when a series of images are put together into a column and make a story. Images below are examples of narrative sequence.  Planning Shoot For my narrative sequence shoot I am going to use two people walking opposite ways through a corridor or down a path passing each other, one person being on the phone and the other person as they pass looks back at the girl/boy on the phone with confusion. I will capture my narrative sequence in black and white to help create a mysterious effect. My Narrative Sequence Below are my narrative sequences, I captured 6 images to then create a collage to show the story being told. I edited my images into Black and White in Photoshop just like the example above my images being black and white give my narrative a old fashioned, moody affect to my story unlike the collage thats in colour. I feel my narrative sequence is

Justin Quinnell: Luman Pinholes

Image
Justin Quinnell Justin Quinnell is a master at making weird and wondrous pinhole images. He worked as the Pinhole consultant for the movie "The Brothers Bloom" and his cameras are featured in the film.  Justin realised his skill with pinhole photography when he was 4 years old and ended up having several operations of his eye and wearing an eye patch. It was after his degree, he was head of photography department at a non-too affluent area in Bristol. The pupils he taught couldn't afford buying digital high end cameras so they used several cans of coke and made cameras out of them. The thing about pin hole cameras that really fascinate Justin Quinnell is that there is no view finder and it clashes art and science together. He also likes the fact that its cheap, and its anti-commercial.