Posts

Showing posts from March, 2018

!Unit 6 3D Work

Image
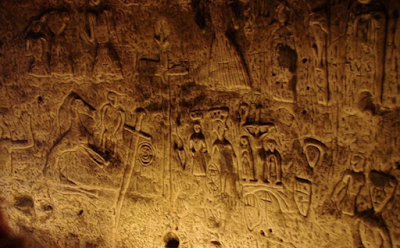
Context For Unit 6, as a class we have been asked to produce a 3D image. This could be anything from a 3D Dimension/model; to a 3D Image, something that comes off the page. For my idea I am going to create a 3D image and buy a pair of 3D glasses so my image will then come out the paper just like a 3D film, however in a still image. Using Photoshop I am going to edit my images of portraits, which I have taken in the set up studio at the back of my classroom. I took 3 images of Chloe and Jada. My images are full length body portraits because I feel they will be more effective when turing it into 3D.  The history of 3D art may have begun with the recognition of likenesses in natural objects for example trees, rocks and ivory, which were modified to enhance that likeness. This early interest in 3D can be seen even in the caves that were home to Upper Paleolithic Europeans. These hunter-gatherers painted stick figures and their abstract images of prey on cave walls, however fleshed

Pinhole Lumen Analysis

Image
Pinhole Lumen Analysis Lumen Pinhole is a type of photography that is taking photographs without a camera, the word pinhole means capturing images without a digital camera its all about capturing the image through a small hole in either a box or a can and letting light for a certain amount of time through the pinhole will expose light to the photographic paper. Below are examples of what Lumen pinholes look like, these are examples from some photographers. For this project we were told to bring in an old can of drink for us to create our own pinhole lumen photography. The next step was to open the top of our can and pierce a needle size hold in the side of the can, we pierced the hole so light can be exposed to the paper I placed inside the can. I duck taped the top of the can so no light could enter and placed tape over the hole, which I didn't take off until I placed my can outside where it could capture the sunset and sunrise for three months. I placed my can outsid

After Effects

After Effects  Above is my attempt of creating an after effect. I feel my attempt is successful, if I was to improve my work i would repeat the process a few more times. The first step we were given a photo that we imported into After Effects. The next step was then separating layers and made layers for each part of the photo. The plane, The shard and The sky. We then moved it the sky layer slightly to make it seem as if the sky was moving along with the plane, which I loved diagonally across the page. I had to make sure I had traced around the plane correctly otherwise you would see parts of the background around the plane meaning my after effect wouldn't look realistic as it passes past the shard. The final edits I made was creating the sky looking warmer creating it to have more vivid colours. One thing I found hard when creating my after effects was judging how fast and far everything should move so it didn't look unrealistic. Overall other than that I found creating